Tutorial - Characters from Library
Characters are probably the most interesting kind of objects. There will be several tutorial topics about characters. There are many characters located in our online library. You can also create your own characters. This tutorial topic is only about ready to use characters from our library.
To use a character from our library you need to include an appropriate header file into your script. For example if you want to use character Boy, you must include file "boy.h". Header files have the same name as character in lower cash with ".h" suffix. They should be included at the top of your script. Here is an example of how could you include character Boy into your script:
#include <boy.h>

void Scene1 ()
{
    Boy Max;
    Max.SetVisible ();
}
You can have 2 or more identical characters in your script at the same time:
#include <boy.h>

void Scene1 ()
{
    Boy Max;
    Max.SetPos ( 200, 250 );
    Max.SetVisible ();

    Boy Ken;
    Ken.SetPos ( -200, 250 );
    Ken.SetVisible ()
}
You can also have 2 or more different characters in your script at the same time:
#include <boy.h>
#include <girl.h>

void Scene1 ()
{
    Boy Max;
    Max.SetPos ( 200, 250 );
    Max.SetVisible ();

    Girl Kim;
    Kim.SetPos ( -200, 250 );
    Kim.SetVisible ()
}
Characters can be moved, rotated, scaled etc. the same way as any other object:
...
    Max.SetPos ( 300, 200 );
    Max.ChangePos ( -300, 200, 2 );
    Max.SetAngle ( 45 );
    Max.SetAngle ( -45, 2 );
    Max.SetScale ( 2 );
    Max.ChangeScale ( 0.5, 2 );
    Max.SetTransparency ( 0.5 );
    Max.ChangeTransparency ( 0, 2 );
...
Characters consist of parts. Every character may have its unique parts. Most human characters contain following parts:
- Body
- Head
- Mouth
- LeftEye
- RightEye
- LeftArm
- RightArm
- LeftLeg
- RightLeg
Character parts can be moved, rotated, scaled etc. similar to regular objects. The only difference is that the methods to work with parts are designed to move them relative to their original position. Please keep in mind that all characters have a designated rectangle and if a part moves outside of this rectangle it may be truncated or hidden.
- SetShift () or ChangeShift () - moves your part relative to its original position. You can also use SetXShift, ChangeXShift, SetYShift () and ChangeYShift () to change only individual part coordinates relative to its original position. Here is an example of how you can move a leg up and to the left smoothly during one second:
#include <boy.h>

void Scene1 ()
{
    Boy Max;
    Max.SetVisible ();

    Max.LeftLeg.ChangeShift ( -10, -20, 1 );
}
- SetAngle () or ChangeAngle () - changes a part angle relative to its origin and original position. Here is an example of how you can change an angle of character's arm smoothly during one second:
    ...
    Max.LeftArm.ChangeAngle ( 15, 1 );
    ...
- SetScale () or ChangeScale () - changes the size of your part according to supplied scale factor. If the scale factor is less than one then a part becomes smaller. If it is bigger than one then a part becomes larger. Here is how you can make a characters head to decrease smoothly during one second:
    ...
    Max.Head.ChangeScale ( 0.5, 1 );
    ...
- SetDecal () - changes a part's decal according to supplied string. Decal is a picture associated with your part. Most of the parts have only one decal called "DEFAULT". There is no sense to use this method with such parts. The only common human parts which have non default decals are:
- LeftEye - it has "WINK1" and "WINK2" decals associated. "WINK1" is basically a half closed eye. "WINK2" is a fully closed eye
- RightEye - The same "WINK1" and "WINK2" decals available. "WINK1" is a half closed eye. "WINK2" is a fully closed eye
- Mouth - It has several decals associated for speaking. These are "SPEAK_M", "SPEAK_E", "SPEAK_A", "SPEAK_O" and "SPEAK_W"
Here is an example of how you can make your character to open his mouth according to different speech sounds. Usually you do not need to do this manually for speech but need to use method Says () which will be described later:
    ...
    Max.Mouth.SetDecal ( "DEFAULT" );
    Sleep (1);
    Max.Mouth.SetDecal ( "SPEAK_M" );
    Sleep (1);
    Max.Mouth.SetDecal ( "SPEAK_E" );
    Sleep (1);
    Max.Mouth.SetDecal ( "SPEAK_A" );
    Sleep (1);
    Max.Mouth.SetDecal ( "SPEAK_O" );
    Sleep (1);
    Max.Mouth.SetDecal ( "SPEAK_W" );
    Sleep (1);
    Max.Mouth.SetDecal ( "DEFAULT" );
    ...
Actually you can do almost everything with your characters just by manipulating their parameters and their parts parameters. But there are several methods available to simplify your life:
- Winks () - to make your character wink. The time in scene will be changed automatically to the moment when wink is completed. Optionally you can supply a duration in seconds. You can also use WinksLeft () and WinksRight () methods to make a character to wink with only one individual eye. Here is an example of how you can make your character to wink 5 times:
    ...
    int i;
    for ( i=0; i<5; i++ )
    {
        Max.Winks ();
    }
    ....
- GoesTo () - to make your character walk to a desired position. You must your supply target coordinates and duration in seconds. Optionally you can supply duration of one step in seconds. Here is how you can make your character to run:
    ...
    Max.SetPos ( 300,290 );
    Max.SetAngle ( -5 );
    Max.GoesTo ( -300, 290, 2, 0.3 );
    Max.SetAngle ( 0 );
    ....
- Says () - to make your character say something. You can supply just a plain text. It will be generated using text to speech engine. There will be more tutorial topics on how to change speech parameters. Alternatively you can supply a path to a WAV file. This can be a WAV file from our library like "wcm/hello.wav" or fully qualified path to a WAV file located online like "http://www.webcartoonmaker.com/lib/sounds/wcm/hello.wav" or fully qualified path to a WAV file on your hard drive like "c:\\hello.wav". Please keep in mind that method Says does not change scene time. Speech is actually generated by WCM player on your computer and the length of WAV file is unknown during compilation. You should use Sleep () command after speech to change time in scene:
    ...
    Max.Says ( "Hello" ); // text to speech is used
    Sleep (1);
    Max.Says ( "wcm/hello.wav" ); // file from WCM online lib
    Sleep (1);
    Max.Says ( "http://www.webcartoonmaker.com/lib/sounds/wcm/hello.wav" ); // online file
    Sleep (1);
    Max.Says ( "c:\\windows\\media\\tada.wav" ); // local file (must exist on your hard drive)
    Sleep (1);
    ...
There will be more tutorial topics on customization of your characters and creation of new ones. Here is an exercise for this tutorial topic:
- Copy and paste the following script to Web Cartoon Maker
#include <boy.h>

void Scene1 ()
{
    // setup a background image
    Image Back ( "backgrounds/ayersrock.svg" );
    Back.SetVisible ();

    // declare a character
    Boy Max;
    Max.SetVisible ();
    Max.SetPos ( 300, 290 );

    // move his leg
    Max.LeftLeg.ChangeShift ( -10, -20, 1 );
    Max.LeftLeg.ChangeShift ( 0, 0, 1 );

    // rotate his arm
    Max.LeftArm.ChangeAngle ( 15, 1 );
    Max.LeftArm.ChangeAngle ( 0, 1 );

    // scale his head
    Max.Head.ChangeScale ( 0.5, 1 );
    Max.Head.ChangeScale ( 1.0, 1 );

    // show all speech decals
    Max.Mouth.SetDecal ( "DEFAULT" );
    Sleep ( 1 );
    Max.Mouth.SetDecal ( "SPEAK_M" );
    Sleep ( 1 );
    Max.Mouth.SetDecal ( "SPEAK_E" );
    Sleep ( 1 );
    Max.Mouth.SetDecal ( "SPEAK_A" );
    Sleep ( 1 );
    Max.Mouth.SetDecal ( "SPEAK_O" );
    Sleep ( 1 );
    Max.Mouth.SetDecal ( "SPEAK_W" );
    Sleep ( 1 );
    Max.Mouth.SetDecal ( "DEFAULT" );

    // wink 5 times
    int i;
    for ( i=0; i<5; i++ )
    {
        Max.Winks ();
    }

    // run
    Max.ChangeAngle ( -5, 0 ); // change it immediately.
    Max.GoesTo ( -300, 290, 2, 0.3 );
    Max.ChangeAngle ( 0, 0 ); // change it immediately.

    // speak
    Max.Says ( "Hello" ); // text to speech is used
    Sleep ( 1 );
    Max.Says ( "wcm/hello.wav" ); // file from WCM online lib
    Sleep ( 1 );
    Max.Says ( "http://www.webcartoonmaker.com/lib/sounds/wcm/hello.wav" ); // online file
    Sleep ( 1 );
    Max.Says ( "c:\\windows\\media\\tada.wav" ); // local file (must exist on your hard drive)
    Sleep ( 1 );

    // wait for a second at the end
    Sleep ( 1 );
}
- Compile it and preview in WCM Player
|  Alan Sturgess shared an excellent video he made using Tales Animator! You can still download Tales Animator here. Unfortunately it is only available for Wi
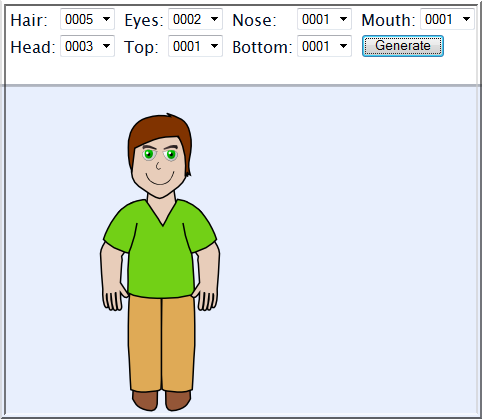 There is a prototype of simple online character designer available
HERE. It is only a prototype,
it does not contain many pieces yet but it can already generat
There is a prototype of simple online character designer available
HERE. It is only a prototype,
it does not contain many pieces yet but it can already generat Now our book "Web Cartoon Maker: A Fun Way to Learn C++" is fully in synch with WCM 1.5!
It is available for download and online reading HERE.
Now our book "Web Cartoon Maker: A Fun Way to Learn C++" is fully in synch with WCM 1.5!
It is available for download and online reading HERE.
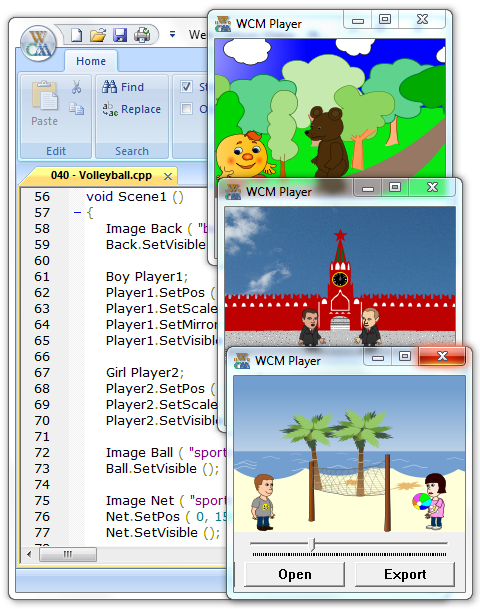 Web Cartoon Maker 1.5 is finally here! You can download it
HERE!
Here is what was updated in version 1.5:
Web Cartoon Maker Desktop Edition is now fully standal
Web Cartoon Maker 1.5 is finally here! You can download it
HERE!
Here is what was updated in version 1.5:
Web Cartoon Maker Desktop Edition is now fully standal